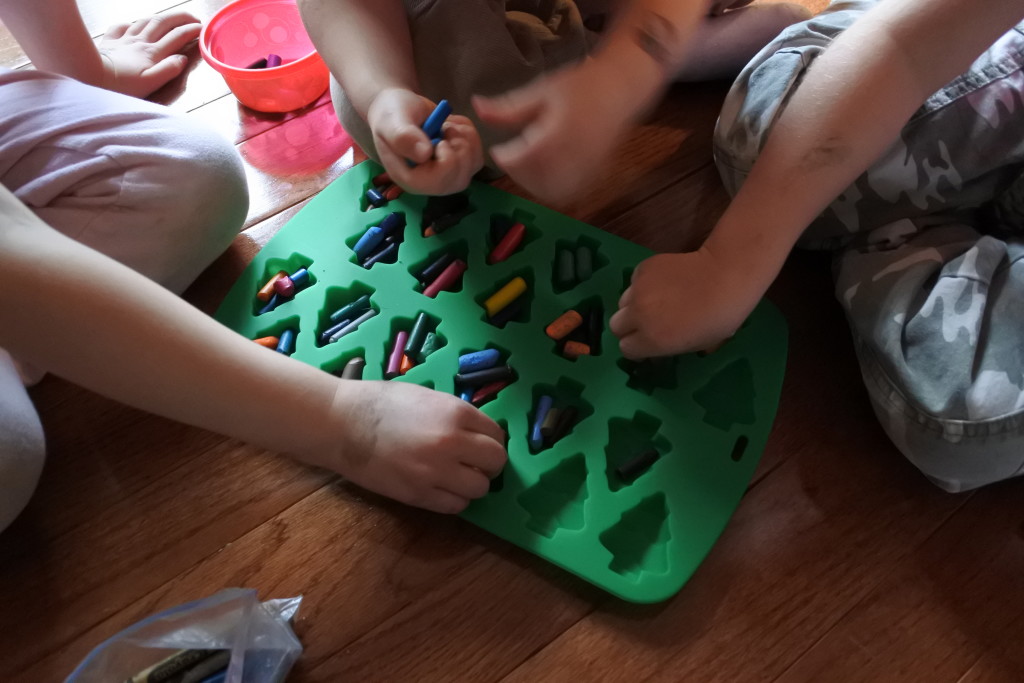

This is by no means an original idea, but it is an idea that I love — using scraps to create something new and useful (and wonderful)!
I tend to keep a ziplock bag of crayons and a small pad of paper in my purse for restaurants or lazy days at the park. Occasionally my crayon bag needs some rejuvenation so I collect all the broken and worn down bits in a dish and save them for a rainy day – to make new crayons 🙂
All you need is your crayon bits, an oven and a silicon mold. For the mold, I would recommend one that would yield a good-sized crayon (i.e. not too tiny or overly large). Also consider how deep it is – you will want a thicker, sturdy crayon… otherwise, you’ll soon be back where you started, with a dish full of bits… :p
My daughter received some of these recycled crayons as a gift when she turned two. They were star-shaped and *so* much easier for her chubby little hands to grasp than typical stick-shaped crayons (plus they made all sorts of fantastically unpredictable rainbow scribbles!). I didn’t find a star-shaped mold, but found this tree-shaped one – small enough to make crayons that are easily grasped by little hands, plus well-suited for upcoming Christmas gifting 😉
I don’t plan on using this mold for baking/edible creations, and I would recommend that you choose a mold that you are okay with dedicating to soap and/or crayon-making activities (i.e. non-edibles).
Fun, simple to make, practical and totally waste-free, these crayons have definitely been one of the most memorable gifts to date. So start saving your crayon bits now!!!
Instructions
Collect all your various coloured crayon bits. Remove any remaining paper/wrappers.
Fill silicon mold with multi-coloured or similarly-coloured crayons, depending on your desired results. If you are aiming for a set of individually coloured crayons (e.g. one red, one yellow, one blue, etc.) then try to put similar tones together so they will blend into a more solid colour once melted. [For ours, we went with the random rainbow effect]
Be sure to fill the molds to the top – the crayon bits will melt down significantly and you may end up needing to top them up with additional bits after the first round of melting (I like to retain a few of the bits for just that reason).
Place the full molds into a 350 degree oven and let melt for about 10-15 minutes, depending on the size and make up of your bits. Remove from the oven and allow to cool.
[As noted above and pictured below, you may want to top up your molds with a second round of bits and pop it back in the oven for an extra 10 minutes for a thicker, more durable crayon]
As the new crayons cool, they will harden and the silicon molds make it easy to pop them out. The kids have fun popping their new crayons out and seeing the resulting mish-mash of colours. Just watch out for impatient little fingers poking at the hot wax……
Simple, fun recycling craft and homemade gifts all in one = win-win!


Leave a Reply